Rebuilding rear shock assemblies

Mechanical issues and How-to articles.

Moderators: DAVID THOMPSON, phlat65

Rebuilding rear shock assemblies

Postby Blurredman » Fri May 29, 2020 4:56 pm

Hey guys,

So I promised a rear shock re-build thread.
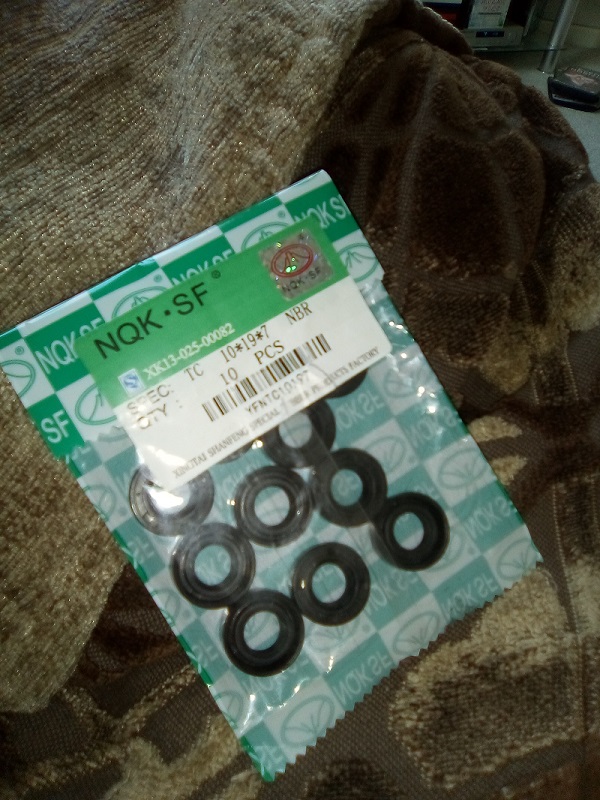
But I had to wait until the 10x19x7 seals came.. Unfortunately I bought them from China because I couldn't source them locally, and no one in the UK seemed to sell them on e-Bay. So I decided to wait. Not least also because they were considerably cheaper. £5.50 for 10, posted from China...
With the belp of these forum posts I also could see what I had to deal with:

https://www.mzriders.com/viewtopic.php? ... cks#p32728
https://www.mzriders.com/viewtopic.php?f=20&t=7360


Warning- The images are large. If you don't have a widescreen or large monitor you may need to Right click on the image and open as a new tab to see the whole image without the forum frames cutting the images..
Thank you

https://www.ebay.co.uk/itm/ID-10mm-TC-R ... 2749.l2649

Image


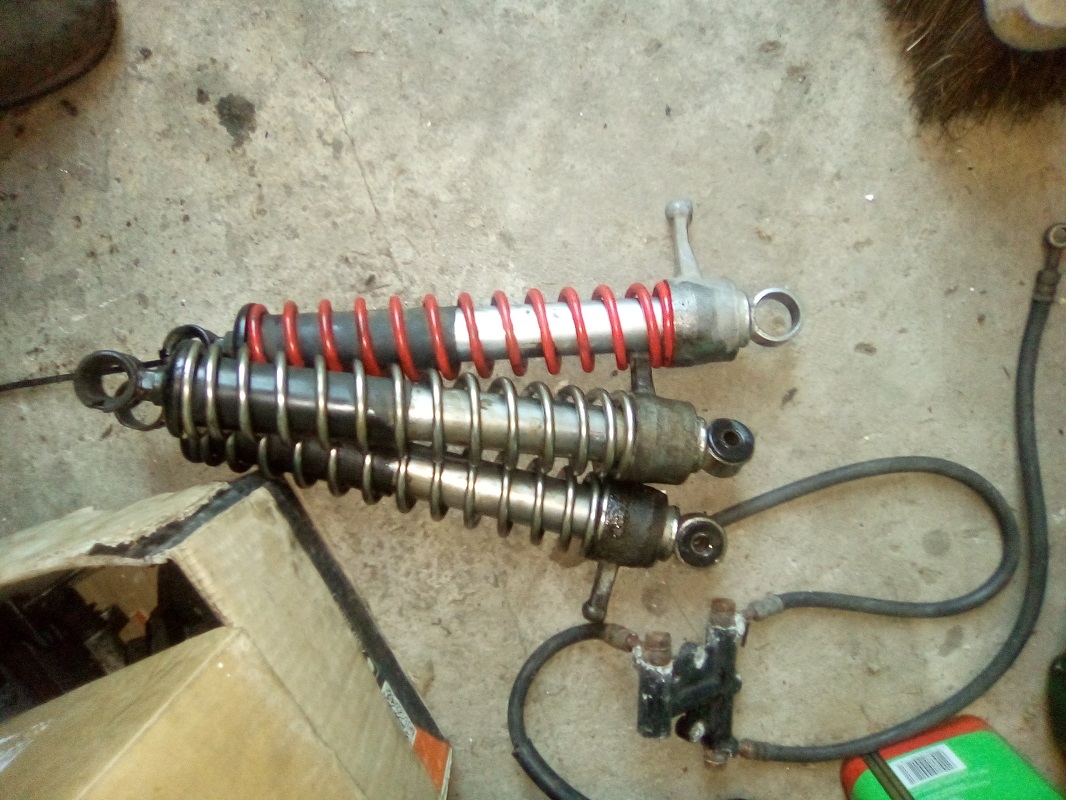
I must say, I had four old shocks that 1 of each pair had unfortunately blown and leaked oil everywhere.. So I decided to take them apart and see exactly what is needed to re-build, if possible. Out of the four I had, one of them could not be disasembled (the top eyelet could not be unthreaded from the main rod- but instead it was riveted in somehow).

If you have a threaded top eyelet.. then you have the technology- you can rebuild it!

So. I'm documenting the 4th one.. after having a practice on the other two..


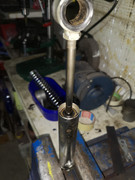
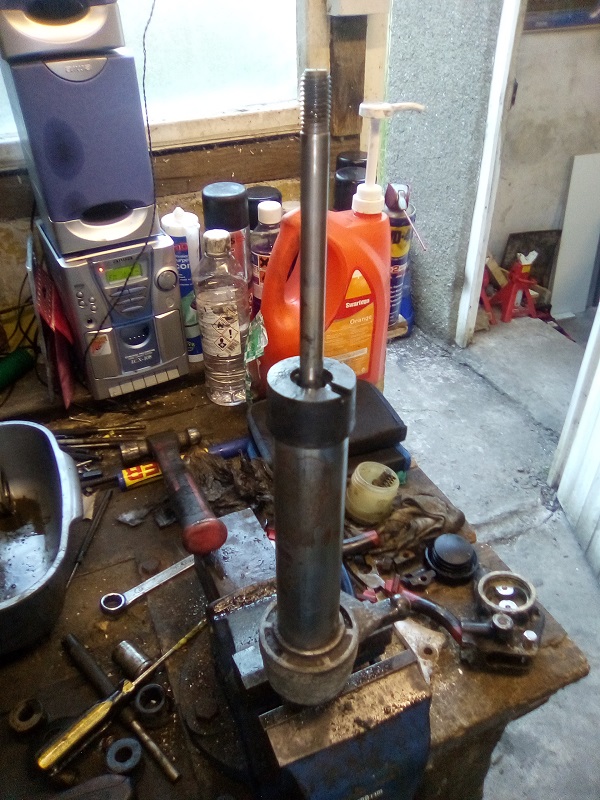
So you start with your shock as shown:

Image

And first you'll want to remove the top retainer pieces. To do this, you will need to compress on the spring, potentially quite a lot in order to fetch out the two individual retainers..

Image

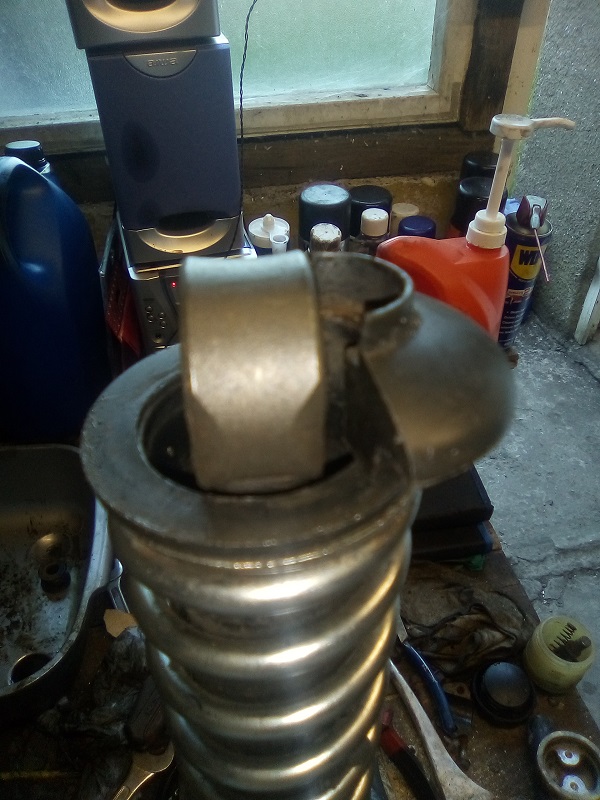
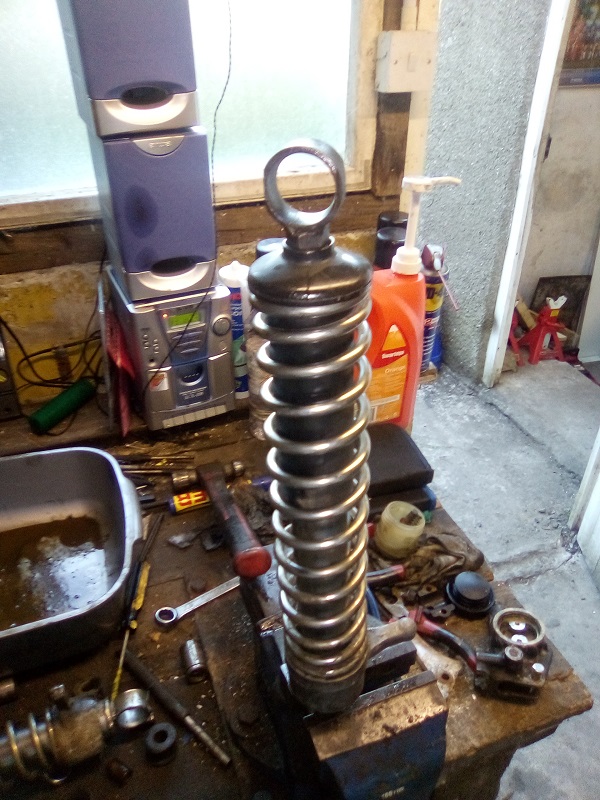
Then you can pull off the spring upwards, and with it the plastic cover.

Image

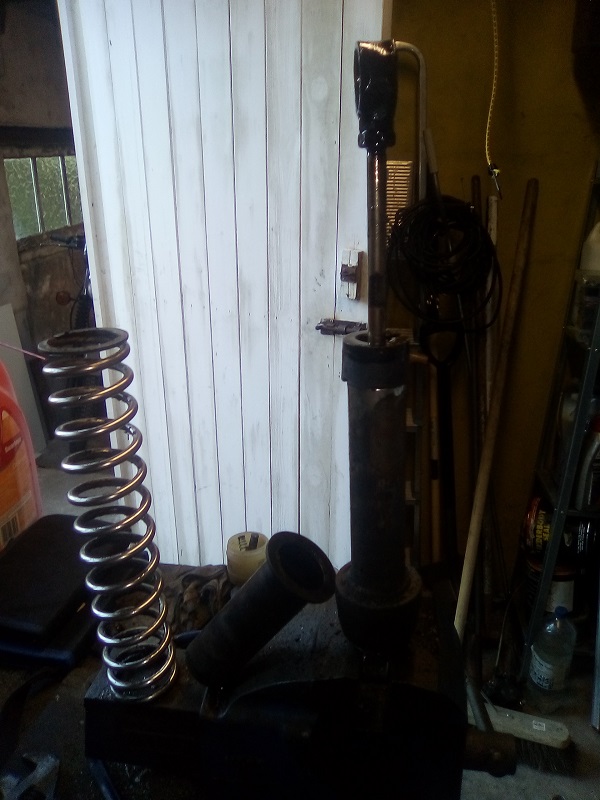
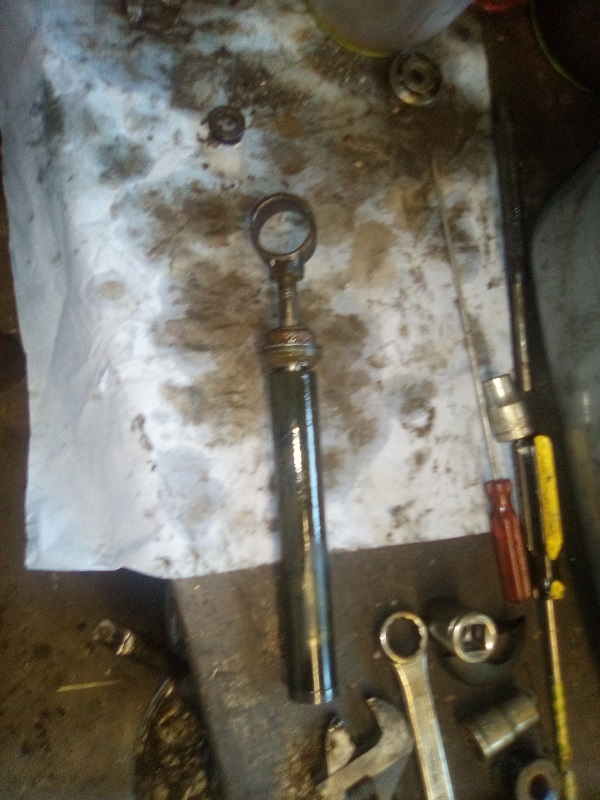
If you have a threaded eyelet, you can unscrew the locking nut and eyelet.

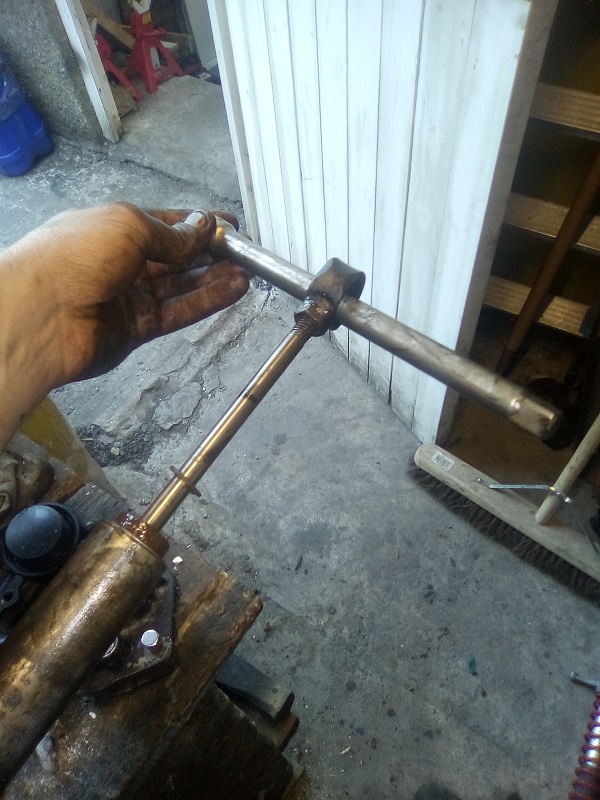
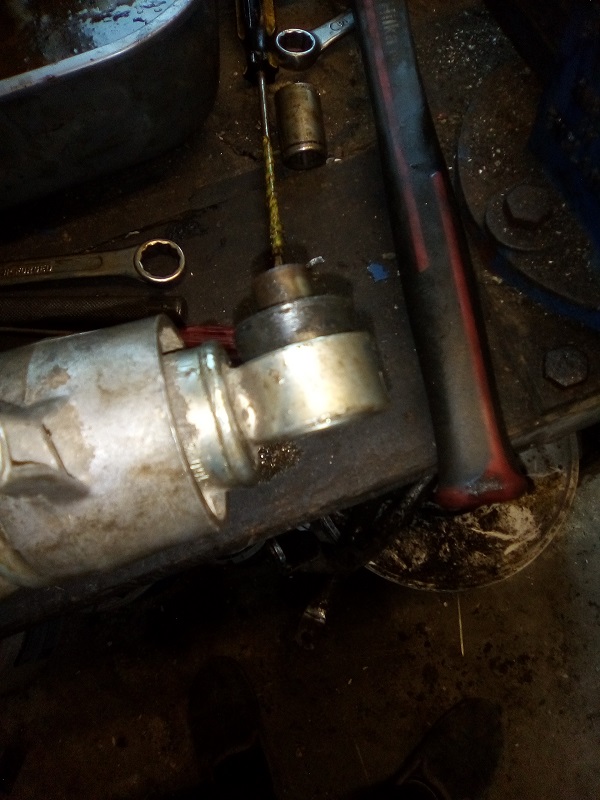
And you will now encounter the threaded retainer of the rod and assembly.. It's not too much of an issue, thre are special tools that MZ say to use- but I used a small punch. Once it starts turning, you can use circlips and easily unscrew it. You may have to clean out the notches quite thoroughly from dirt.

Image

Image


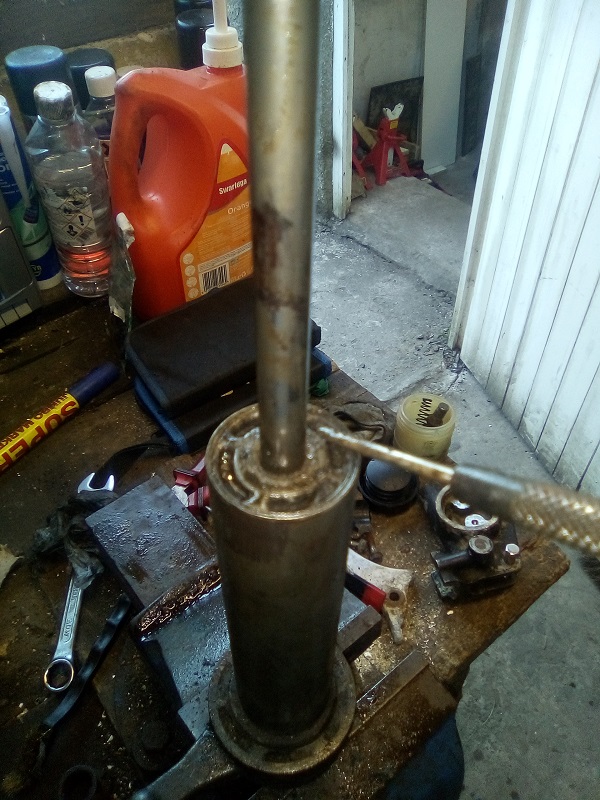
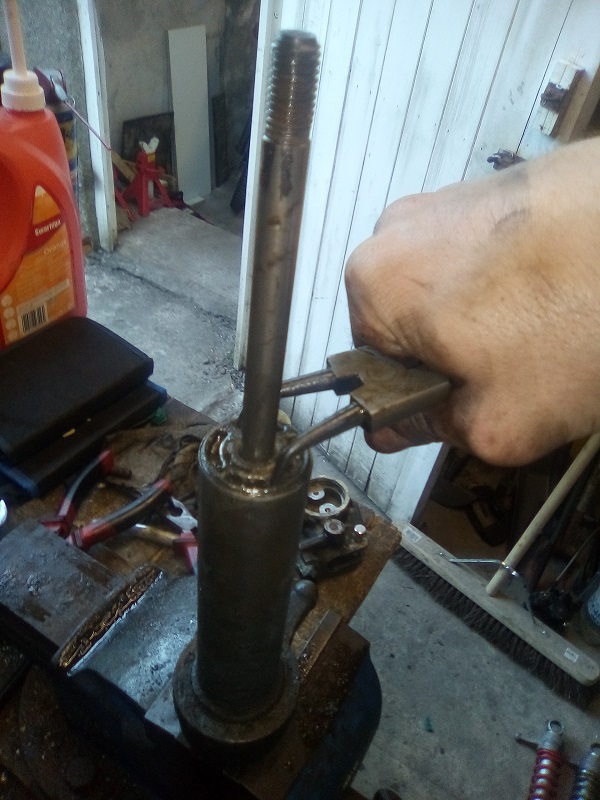
Once that is removed, you will very likely have to re-install the eyelet, because although the retainer is free, you will likely find it very difficult to remove the shaft and the internals. You merely need to pull on these, but I myself had to use sacrificial socket extension and a hammer..

Image


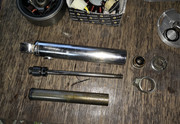
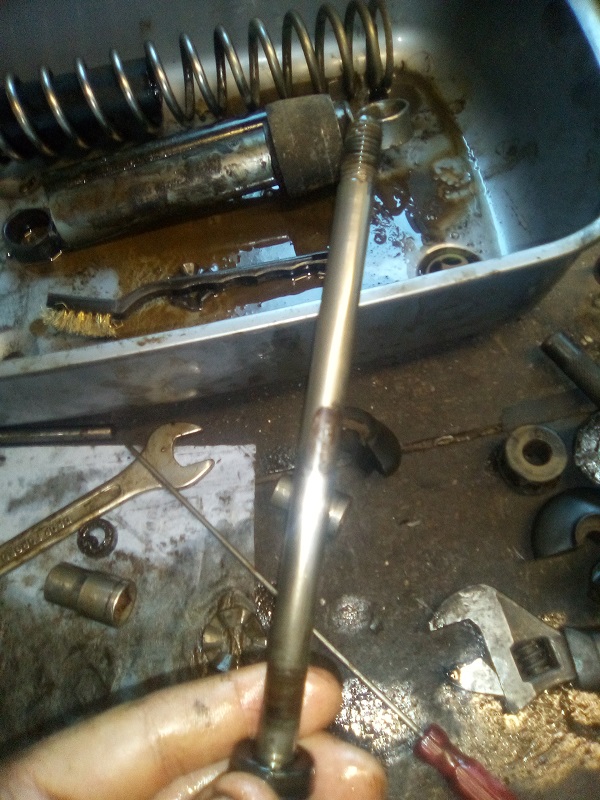
And there the inner assembly comes out of the lower shock.

Image


And if you pull on the eye more, you can detach the assembly from the tube that encompasses it.

Image


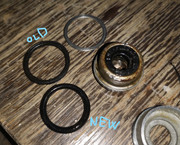
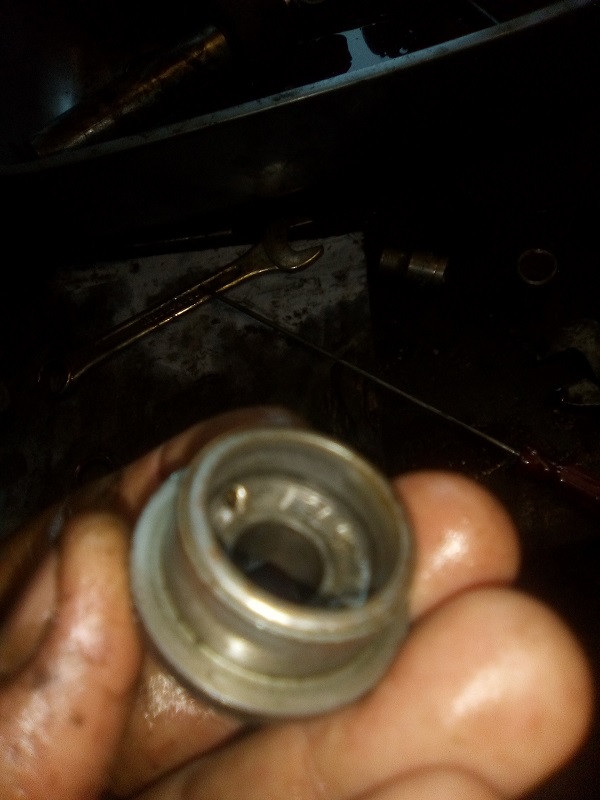
Now you can take off the eyelet and remove each component, I didn't have the lower seals, so I merely took the top most oil seal unit off.
You must now inspect the shaft. I found that all four of mine were in very poor condition from either previous owners dismantling the system, or it seems rub or neglect wear.

This one isn't too bad. There are no gauges, just wear witness marks. That said- This particular shock was not leaking before I took it apart.

Image

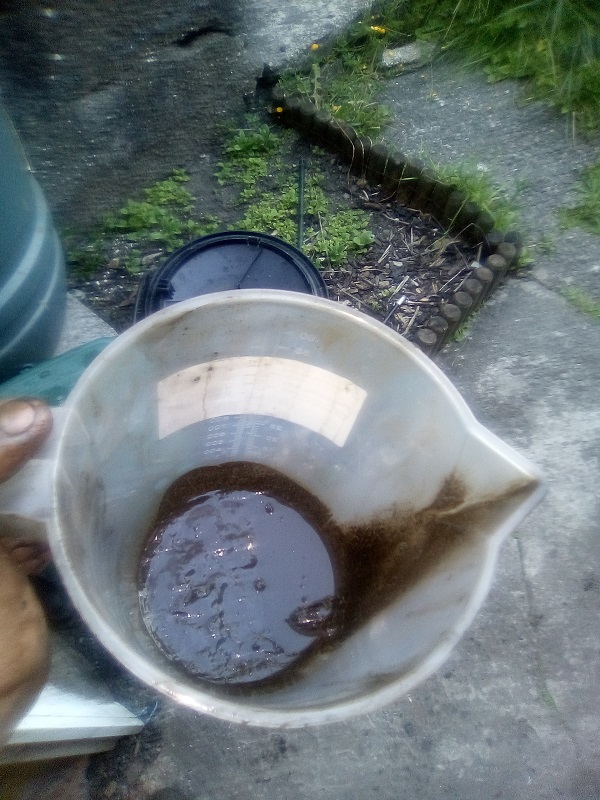
Now to drain the old oil.. And this is what mine looked like:

Image

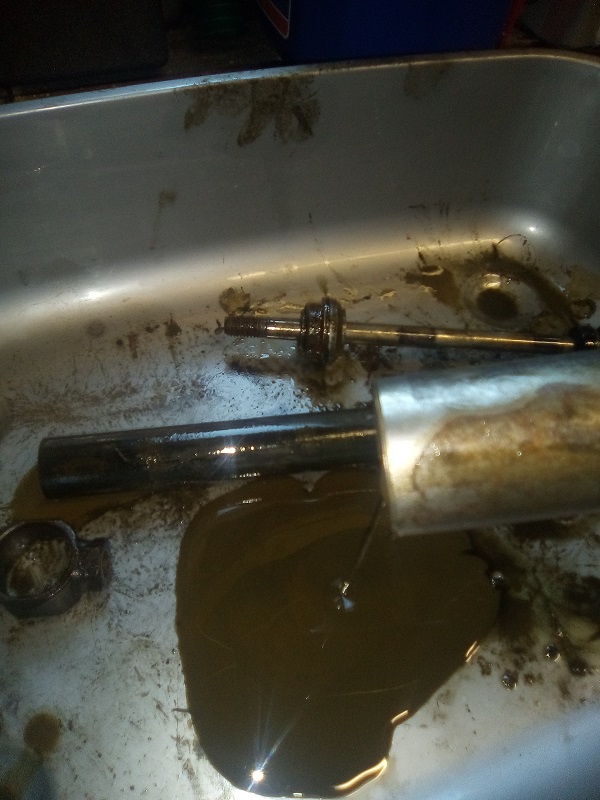
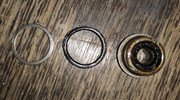
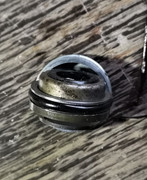
You'll want to be careful at this stage, as this 'star' looking thing sits at the bottom of the tube and will likely fall out.. make sure you don't forget it..!

Image

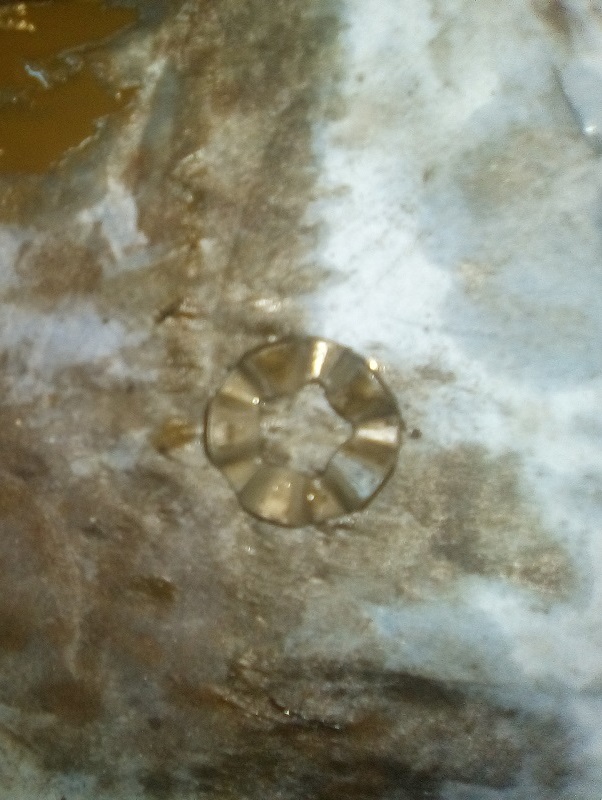
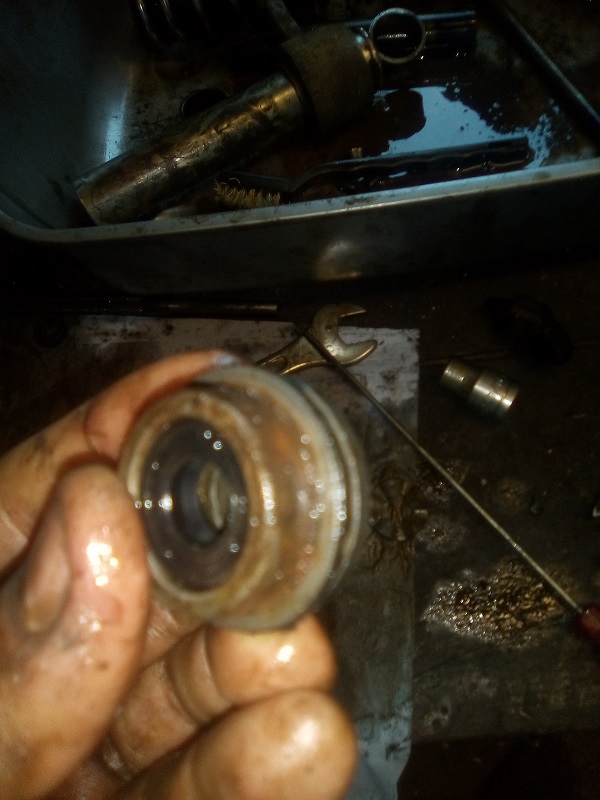
So, this device holds the main oil seal.. It is two parts

Image

And can simply be prised apart without too much effort as so:

Image

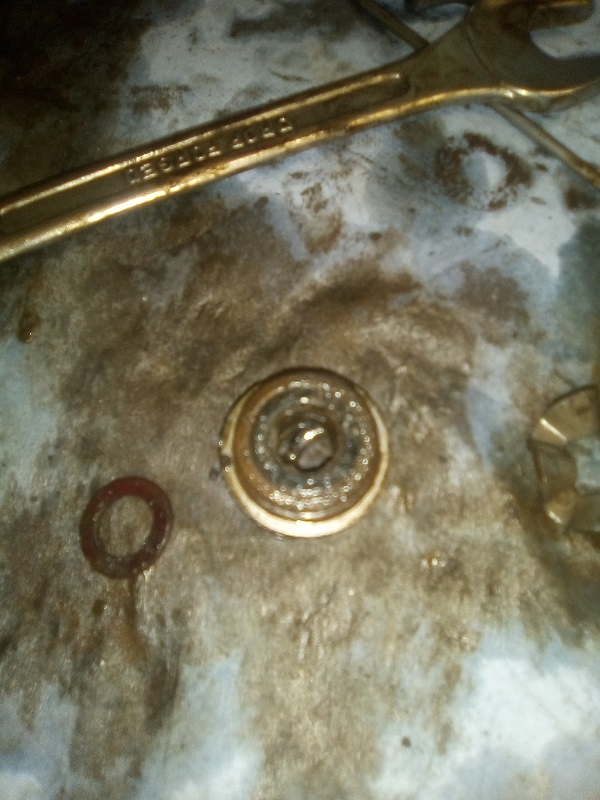
After splitting the two pieces and prising out the old seal, Make sure to clean the area

Image

Dig out the old seal, and push in the new one.. Not a lot of effort is required here. You might want to lube a bit with ATF.

Image


And now.. It's time for re-assembly already! Obviously clean everything. Now, you may have noticed that I have not loosened up and removed the adjustment sleeves. The fact of the matter is, I tried to remove one but the only way to do that was with hammering. They are stuck solid and unless you have a replacement to use, I wouldn't bother. You will destroy the shock adjuster, and if you do get it off, you'll have to do a lot of cleaning and cleanance gapping in order for it to go back on smoothly. I myself have never felt the need to adjust, and even if I could I would only use the facility one a very blue moon. I rarely have passengers.


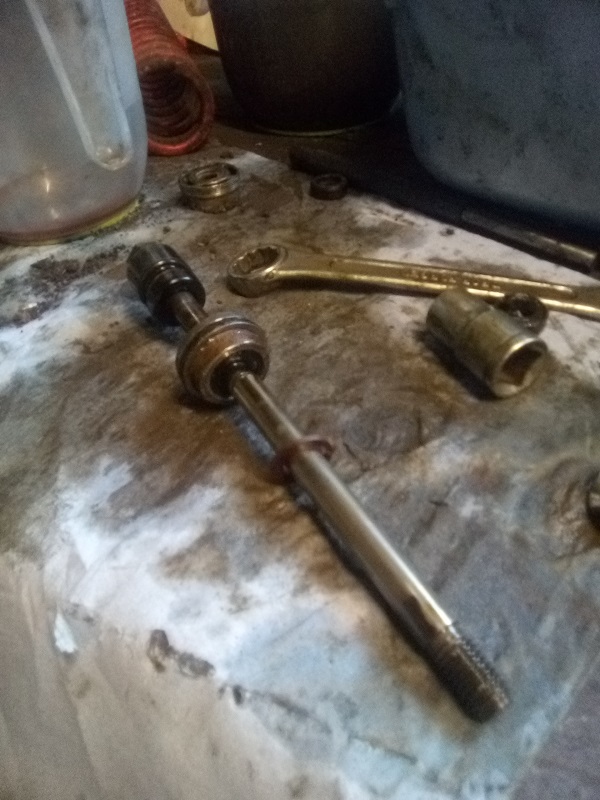
This is the main rod assembly and order of items for installing it into the inner tube..

Image

But first.. Time to put that star shaped thing into the lower shock assembly, and the inner tube!

It took me a bit of time to find out what oil capacity is required. The MZ official manual and the MZ Haynes manual say nothing at all about capacity- they just say "fill with oil", which isn't necessarily helpful. If you measured how much came out and presumed it hadn't leaked before.. then you might be re-filling with incorrect capacity.

But, I found this website, and the capacity seemed about right at 80cc...
http://www.sweller.co.uk/mz/workshop/wrk_shock.html

I myself used ATF.

And once the oil is installed and the tube and star, push the assembly in the inner tube... and then lock in place with the assembly retainer..

Image

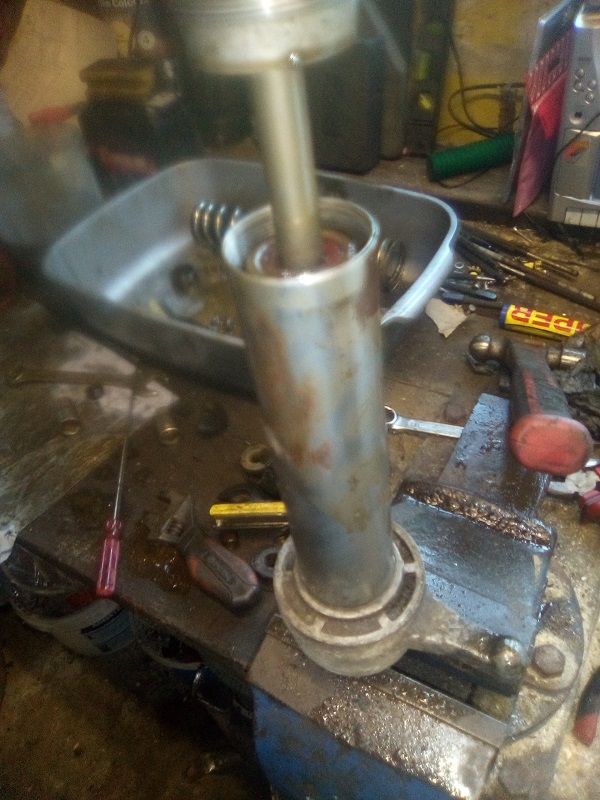
I used circlips once again to tighten up the retainer as much as I could by hand. From there, I used a punch and a hammer to tighten the lock by another quarter of a turn.

Image

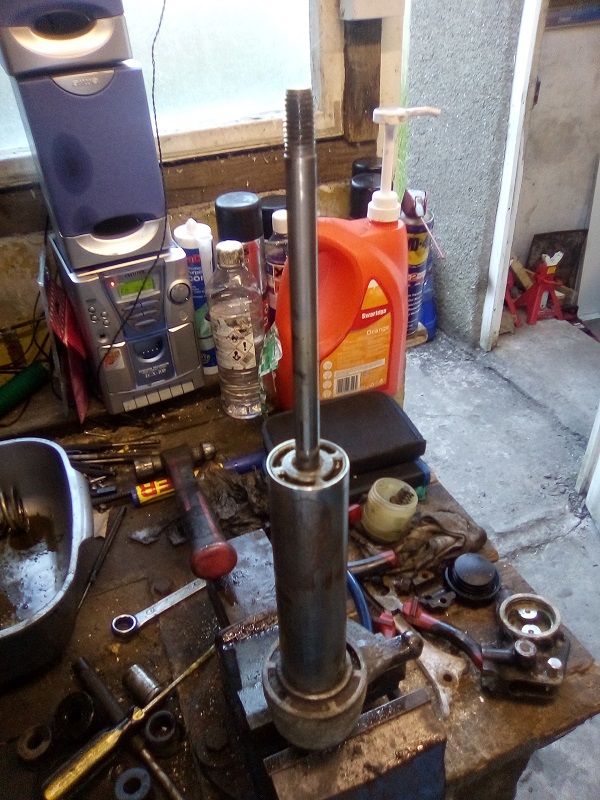
And then the rubber bung (I suppose this is a bump stop)..

Image

I neglected to previously mention, but this item fits inside the black plastic upper rod gaurd...
You will then likely want to install the eyelet and retaining lock nut.

Then re-install the spring, and the plastic inner guard and then you can pull on the eyelet and push down on the spring to install the two piece retainers..

Image

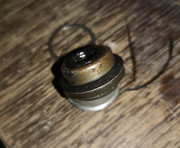
The lower bushings are easiest to assembly by putting the rubber part in half way, then insert the inner metal bushing. then you can align them from there.

Image


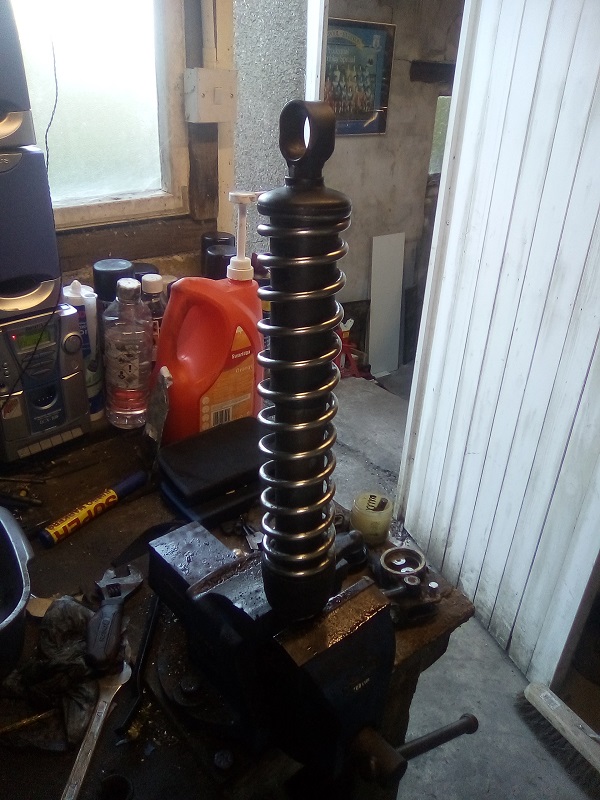
And now you have a re-built shock..
Image

And a very dirty washing jug...

Image


They may leak again..... I don't know, my rods weren't in the best condition for me... But with new oil seals and a clean of the assemblies and new oil may be all that is required..

It's worth a go for the price of a single seal (or 10 for £5.50), and 80cc of ATF!!
Last edited by Blurredman on Sun May 31, 2020 1:04 pm, edited 2 times in total.
1973 MZ ES250/2 - 17,000 miles - The project! :)
1979 Suzuki TS185ER - 9,000 miles - Mud :)
1981 Honda CX500B - 91,000 miles - Long Distance :)
1987 MZ ETZ300 - 38,000 miles - Sun :)
1989 MZ ETZ251 - 49,000 miles - Commute :)

ftp://blurredmanswebsite.ddns.net/Vehicle_Documents/MZ_Documents/
User avatar
Blurredman
 
Posts: 1231
Joined: Sat Feb 09, 2013 3:59 pm
Location: South Wales

Re: Rebuilding rear shock assemblies

Postby Puffs » Sat May 30, 2020 4:40 am

Following a biased and flawed moderator choice (someone posting aggressive personal attacks is rewarded, while my technical posts are removed - behind my back & without any justification!), I have withdrawn from this forum.
Last edited by Puffs on Mon Apr 03, 2023 10:50 am, edited 1 time in total.
User avatar
Puffs
 
Posts: 2007
Joined: Tue Jan 16, 2018 11:20 am
Location: Ardennes, Belgium.

Re: Rebuilding rear shock assemblies

Postby Blurredman » Sat May 30, 2020 1:55 pm

Thanks Puffs. I have taken your suggestion into consideration and have re-sized the images.. But have also uploaded and linked them to my own data source. The links should never break now.

Of course.. I don't expect these shocks not to leak.. I actually bothered to assemble even the ones I knew might leak before long- simply to find out how it works and how it all goes together.. If they leak because of poor rod- There's not much I can do except find rods from somewhere, or indeed whole new shock assemblies..

I might re-build the one with the red springs again as that feels stiff- but that could be the spring itself.
The two chromed springed assemblies both damp and rebound the same after assembly.. They are a matching pair :)
1973 MZ ES250/2 - 17,000 miles - The project! :)
1979 Suzuki TS185ER - 9,000 miles - Mud :)
1981 Honda CX500B - 91,000 miles - Long Distance :)
1987 MZ ETZ300 - 38,000 miles - Sun :)
1989 MZ ETZ251 - 49,000 miles - Commute :)

ftp://blurredmanswebsite.ddns.net/Vehicle_Documents/MZ_Documents/
User avatar
Blurredman
 
Posts: 1231
Joined: Sat Feb 09, 2013 3:59 pm
Location: South Wales

Re: Rebuilding rear shock assemblies

Postby dave47 » Sun May 31, 2020 1:57 am

Regarding the quantity of oil:
The supa5 owners handbook states there is 70cc of "Globo" in each shock and 230 cc of the same in each fork leg. I believe the ETZ shocks use the same damping body, although the springs differ in appearance.
dave47
 
Posts: 173
Joined: Sat Apr 27, 2019 11:56 am

Re: Rebuilding rear shock assemblies

Postby Puffs » Sun May 31, 2020 6:19 am

Following a biased and flawed moderator choice (someone posting aggressive personal attacks is rewarded, while my technical posts are removed - behind my back & without any justification!), I have withdrawn from this forum.
Last edited by Puffs on Mon Apr 03, 2023 10:50 am, edited 1 time in total.
User avatar
Puffs
 
Posts: 2007
Joined: Tue Jan 16, 2018 11:20 am
Location: Ardennes, Belgium.

Re: Rebuilding rear shock assemblies

Postby Kruh » Thu Jun 04, 2020 3:39 am

All the pictures went missing...
User avatar
Kruh
 
Posts: 149
Joined: Tue Nov 26, 2019 4:15 am
Location: In the shed

Re: Rebuilding rear shock assemblies

Postby Blurredman » Thu Jun 04, 2020 3:51 am

Yes. I realised this morning that my server seems not to be accepting ftp or http... will try and sort out tonight... :smt005
1973 MZ ES250/2 - 17,000 miles - The project! :)
1979 Suzuki TS185ER - 9,000 miles - Mud :)
1981 Honda CX500B - 91,000 miles - Long Distance :)
1987 MZ ETZ300 - 38,000 miles - Sun :)
1989 MZ ETZ251 - 49,000 miles - Commute :)

ftp://blurredmanswebsite.ddns.net/Vehicle_Documents/MZ_Documents/
User avatar
Blurredman
 
Posts: 1231
Joined: Sat Feb 09, 2013 3:59 pm
Location: South Wales

Re: Rebuilding rear shock assemblies

Postby Kruh » Thu Jun 04, 2020 1:57 pm

Thanks for fixing the pictures and thanks for the guide. It definetly helped me. Although you did miss one thing.
Also I got TS250 shocks and the seem to be the same. (fo anyone wondering)


Image

Image

Image


To anyone doing this job I would strongly suggest that you also replace the outer seal. The inner shaft seal is only part of the job.
Oil can also leak on the outside of that cap (seal carrier). Especially if yours is looking as bad as mine; you can se strands of rubber from that seal on the photos.
A simple O-ring solves that. Especially when it gets compressed - sould seal perfectly. I got one from my cheap O-ring set.


Image

Image

Image

Image


It was pretty simple to take it apart. Although it took quite the beating to get the sleeve out.
Time to wash all the gunk from inside and put it all together.
User avatar
Kruh
 
Posts: 149
Joined: Tue Nov 26, 2019 4:15 am
Location: In the shed

Re: Rebuilding rear shock assemblies

Postby handsomejackuk » Thu Jun 04, 2020 2:08 pm

Blurredman wrote:Yes. I realised this morning that my server seems not to be accepting ftp or http... will try and sort out tonight... :smt005


nice work bud, very comprehensive build with pictures..

where to are you from bud...? in south wales...

i am from Blaina.... NP13 area
I'm a schizophrenic so am I !!!!
handsomejackuk
 
Posts: 939
Joined: Thu May 04, 2006 10:13 am

Re: Rebuilding rear shock assemblies

Postby Kruh » Wed Jun 10, 2020 2:20 am

While I was assembling my shocks yesterday, I came across another detail. Which wasn't specifically mentioned.

That 'star' looking thing is not symmetrical and needs to be installed the right way. If you take a close look at the 'star' looking thing, you will notice it has a flat and an angled side. The flat side faces the bottom of the shock, while the angled side faces the cartridge.

I don't know what effect it has when installed backwards, but the factory made it like that for a reason. So hopefully this helps anyone rebuilding their shocks.
User avatar
Kruh
 
Posts: 149
Joined: Tue Nov 26, 2019 4:15 am
Location: In the shed

Re: Rebuilding rear shock assemblies

Postby Puffs » Wed Jun 10, 2020 3:40 am

Following a biased and flawed moderator choice (someone posting aggressive personal attacks is rewarded, while my technical posts are removed - behind my back & without any justification!), I have withdrawn from this forum.
User avatar
Puffs
 
Posts: 2007
Joined: Tue Jan 16, 2018 11:20 am
Location: Ardennes, Belgium.


Return to Mechanic/Tech Talk

Who is online

Users browsing this forum: No registered users and 159 guests