valve clearances.... a how to

Vehicles equipped with the 500 cc Rotax engine

Moderators: DAVID THOMPSON, phlat65

valve clearances.... a how to

Postby hmmmnz » Thu Mar 11, 2010 5:07 am

right gear needed
a 10mm spanner
a 11mm spanner
a set of feeler gauges (metric)
a spark plug spanner
a flat head screwdriver
and what ever tools you need to remove the tank
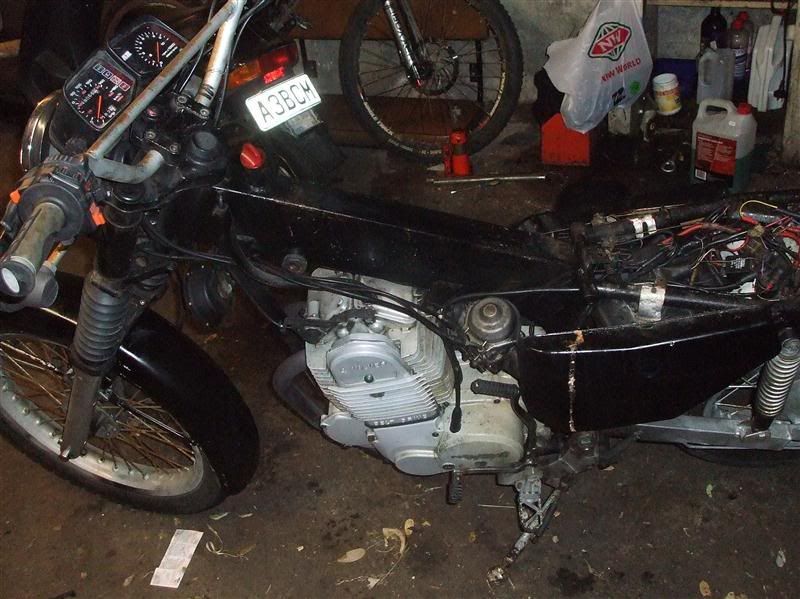
 :D

1. remove tank
Image

2. unbolt the decompression lever bracket
Image
Image

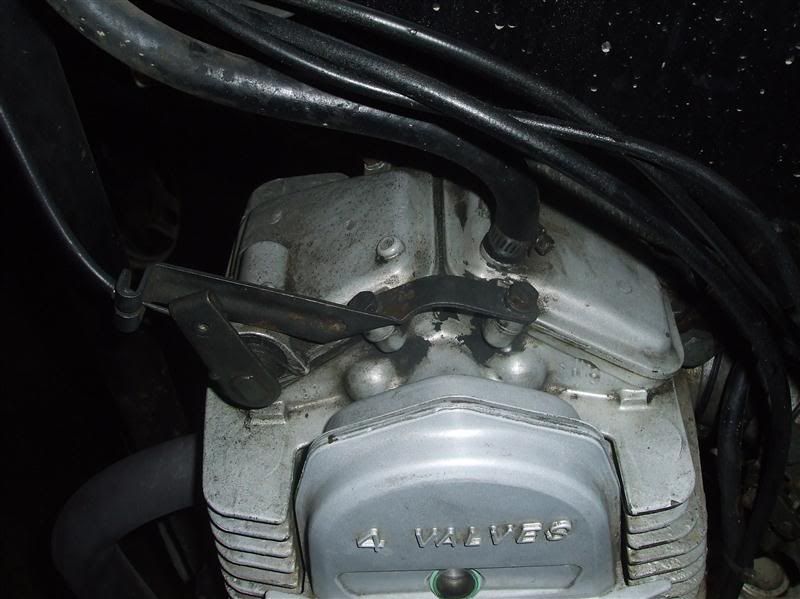
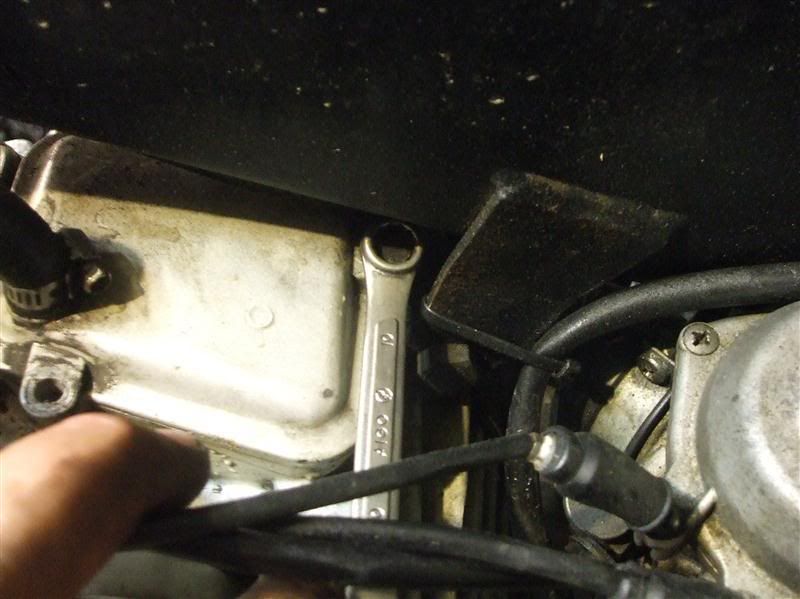
3. with a 10mm spanner remove the rocker covers (2)
Image
Image

4. undo the spark plug (with the decomp lever gone, you need the plug out to turn the engine over by hand)
Image

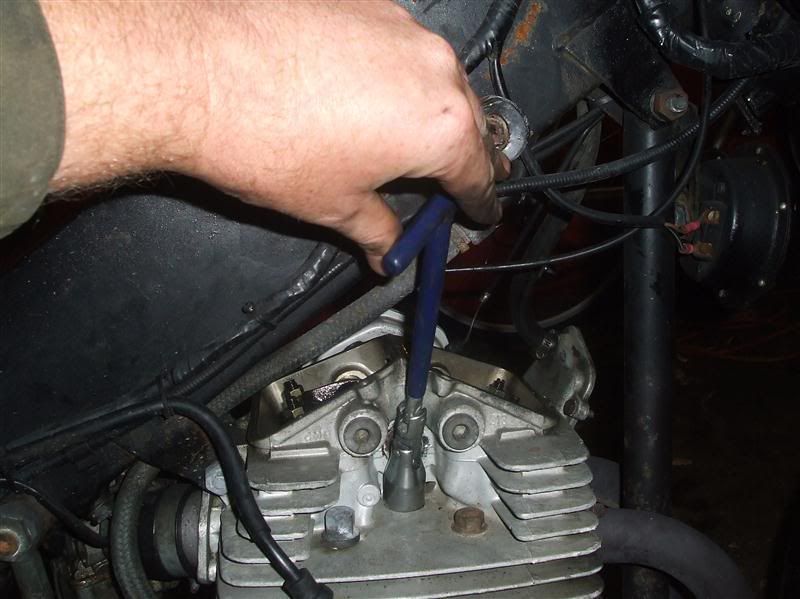
5. turn the engine to top dead center.. supposedly you can see a little white mark through the peep hole which indicates it there..
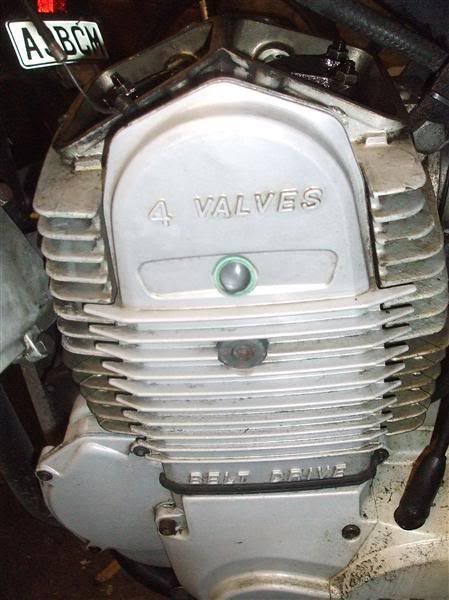
Image

i can't :D anyway its not really needed, if you use the kick starter turn the engine over and watch the cam and rockers move. the exhaust rocker will go down (indicating exhaust stroke) then the inlet rocker will go down (you guessed it.. inlet stroke) then its the compression stroke followed by the power stroke
you don't have to be super accurate with this basically somewhere between compression and expansion (power) where neither cam lobe is pushing on the rocker arm :D (number 3 on pic below)
Image

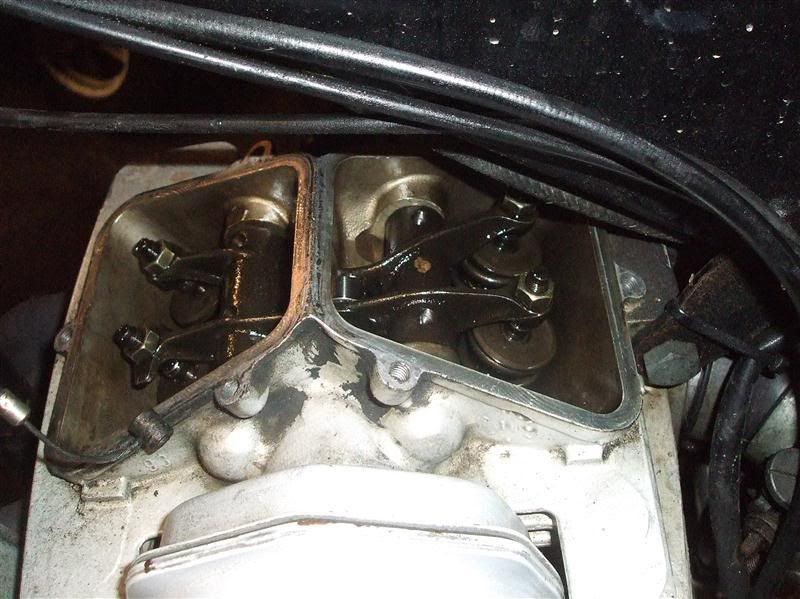
6. now we are going to set the clearances (i saay set, because its just as easy to straight out set them, as it is to check them) on cam over bucket over shim engines or cam over shim engines you have to check and record the clearances before you change the shims so you know what new shim to insert... but no need to worry about that with the super simple rotax lump :D

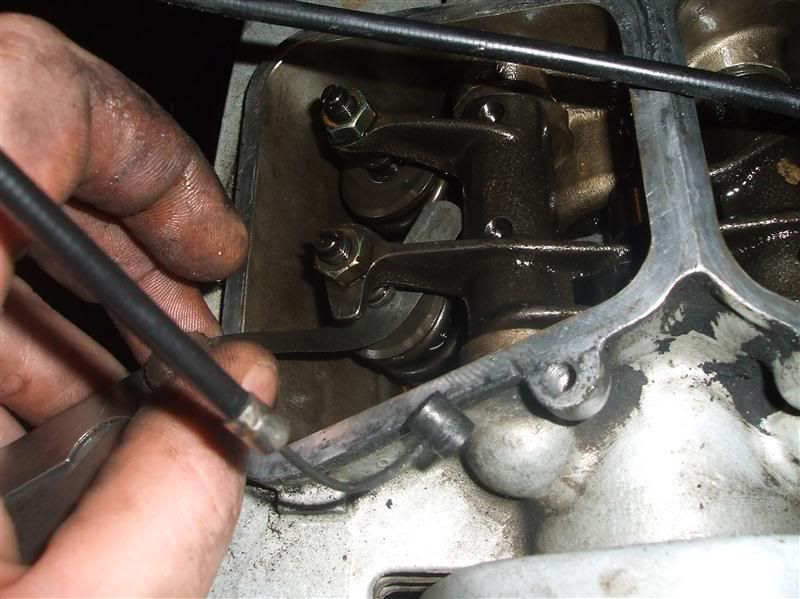
7. loosen your inlet tappets with a 11mm spanner .
with your 0.05mm feeler (or for you americans ... 0.05mm :D its a metric lump and the way of the future :D)
Image
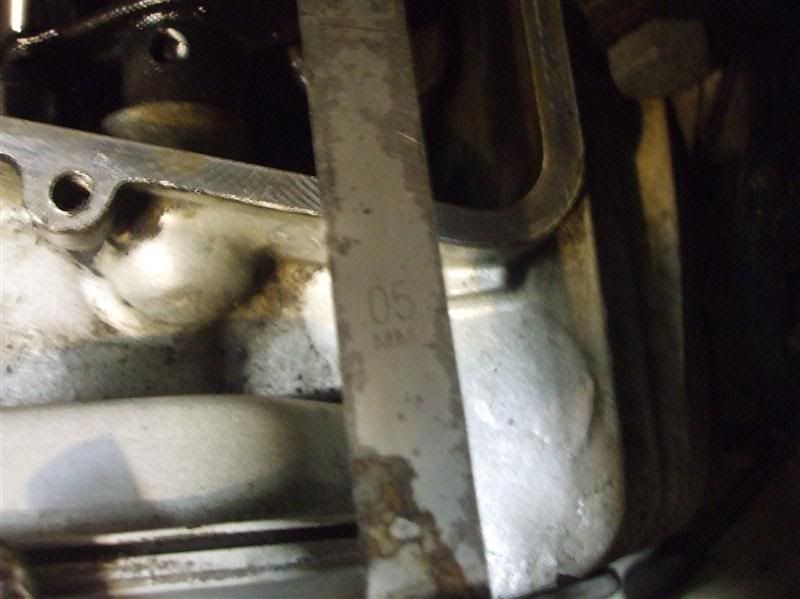
slip it between the tappet and the top of the valve stem,

8. with your spanner on the lock nut and your feeler in place, tighten the tappen with your flat head screw driver, untill it becomes tight, then back the screwdriver off a wee bit. the feel should be able to move but you should feel the resistance of the tappet.. you'll know what i mean when you do it
Image

9. do the other tappet, and then move to the exhaust

10. the exhaust side, now this is where a debate could start, the manual states 0.05mm for both exhaust and inlet clearances, its not a misprint, thats what rotax recomends, but i still do the exhaust at 0.08mm simply for the fact there is more heat on the exhaust valves and therefore move valve expansion, so any where between 0.05mm and 0.1mm is fine,
if you ride your mz hard then i recommend 0.1mm if you ride it nicely then i recomend somewhere between :D
Image

and thats it, set your exhaust clearances to what ever you decide, make sure all your lock nuts are tight, chuck the rocker covers back on, connect the decomp cable, and your good to go


have fun :smt006
Last edited by hmmmnz on Thu Mar 11, 2010 7:51 pm, edited 4 times in total.
"Don't... Don't put the noodles and the dumplings together in the boat. They'll fight! The noodles are bullies. Poor dumplings."
User avatar
hmmmnz
 
Posts: 62
Joined: Thu Jan 14, 2010 6:32 pm
Location: wellington, new zealand

Re: valve clearances.... a how to

Postby comanche91 » Thu Mar 11, 2010 12:23 pm

Thanks - very nice writeup! I like your adjustment screwdriver below. :-D I see you also replaced the vent hose. Agree, that should be done while the tank is off too.

Did you need new gaskets or just use sealant on the valve covers?

Image
-Don
Image
1-3/4 1995 Silver Stars
User avatar
comanche91
 
Posts: 432
Joined: Sun Aug 16, 2009 4:50 pm
Location: Sweet Home Alabama

Re: valve clearances.... a how to

Postby hmmmnz » Thu Mar 11, 2010 3:17 pm

no gasket required, they have orings in a groove in the covers :D
yeah my electrical screwdrivers get a hard life :D
User avatar
hmmmnz
 
Posts: 62
Joined: Thu Jan 14, 2010 6:32 pm
Location: wellington, new zealand

Re: valve clearances.... a how to

Postby nikitino » Mon Mar 15, 2010 12:02 pm

Yeah thanks for the write up w/pics. I've never done this procedure before on any bike but i know that i will need to do this soon on my Country 500. Hopefully it will be as easy as it looks in your write up. If not, I may post up for some help....thanx again
nikitino
 
Posts: 76
Joined: Thu May 01, 2008 11:06 am
Location: Missouri, USA

Re: valve clearances.... a how to

Postby comanche91 » Thu Jun 10, 2010 8:21 pm

Hmmmnz, getting ready to check the valve adjustment and looked in my manual (published by Ron Wood & Co.) and it recommends .004" (.10 mm) for both intake and exhaust, and .005" (.127mm) for racing engines. Then looked in the German online MZ 500R manual and they recommend .05mm for both intake and exhaust. Quite a variance there. :?:

Also it makes sense what you are saying on the hotter exhaust valve getting a higher clearance value.
-Don
Image
1-3/4 1995 Silver Stars
User avatar
comanche91
 
Posts: 432
Joined: Sun Aug 16, 2009 4:50 pm
Location: Sweet Home Alabama

Re: valve clearances.... a how to

Postby hmmmnz » Sun Jun 13, 2010 7:22 am

its up to you really, .1mm isnt a particularly large gap compared to some bikes,
i found with .1mm on the intake and exhaust, that it was a little tappy, so i changed the inlet to .05mm and that quietened it down,
its a personal thing really, you could go upto .2mm with no adverse affects,

your call, my bike runs sweet as a nut on 0.5mm and 0.8mm,
User avatar
hmmmnz
 
Posts: 62
Joined: Thu Jan 14, 2010 6:32 pm
Location: wellington, new zealand

Re: valve clearances.... a how to

Postby Nozz » Sun Jun 13, 2010 8:49 am

Thanks for the guidance. That does look easy enough, but I said that before! Actually, I have mine all sorted out again after the sprag clutch mess. Went for a nice 4 hour ride yesterday with friends and it's running great. Now I am on to getting the other bike back on the road. I just had the old crank end repaired and a new pulley sent, so the last hurdle has been cleared. Y'all ride safe and have fun...
Attachments
cow-reek-june-10.jpg
User avatar
Nozz
 
Posts: 150
Joined: Mon Jul 12, 2004 9:35 pm
Location: Austin, Texas

Re: valve clearances.... a how to

Postby comanche91 » Sun Jun 13, 2010 11:15 am

hmmmnz wrote:its up to you really, .1mm isnt a particularly large gap compared to some bikes, i found with .1mm on the intake and exhaust, that it was a little tappy, so i changed the inlet to .05mm and that quietened it down, its a personal thing really, you could go upto .2mm with no adverse affects, your call, my bike runs sweet as a nut on 0.5mm and 0.8mm,


Thanis hmmmnz; I'll probably split the difference. :-D

Nozz wrote:Thanks for the guidance. That does look easy enough, but I said that before! Actually, I have mine all sorted out again after the sprag clutch mess. Went for a nice 4 hour ride yesterday with friends and it's running great. Now I am on to getting the other bike back on the road. I just had the old crank end repaired and a new pulley sent, so the last hurdle has been cleared. Y'all ride safe and have fun...


Nozz, is the Silvy in the pic with the Ron Wood megaphone the one you're riding now, or the other bike you're getting back on the road?
-Don
Image
1-3/4 1995 Silver Stars
User avatar
comanche91
 
Posts: 432
Joined: Sun Aug 16, 2009 4:50 pm
Location: Sweet Home Alabama

Re: valve clearances.... a how to

Postby Nozz » Sun Jun 13, 2010 2:55 pm

Don,

That's my current ride, about to turn over 50,000km. The one in bits and pieces is the one on my profile with the black and chrome tank. Of course, it will sport the Woods Rotax can as well as the 40 mm dellorto I'll send you the cam info when I see it again. I have one stock pipe and two Woods...
User avatar
Nozz
 
Posts: 150
Joined: Mon Jul 12, 2004 9:35 pm
Location: Austin, Texas

Re: valve clearances.... a how to

Postby 95SaxonTour » Wed Mar 30, 2011 9:05 pm

Excellent tutorial, hmmmnz! I did mine up like you suggested going with .08 on the exhaust and .05 on the intake. I had to take it for a test ride and of course it was snowing like hell. I now have a little more pep off the line.

Ryan
Attachments
march2011.jpg
95SaxonTour
 
Posts: 77
Joined: Thu Jul 30, 2009 8:32 pm


Return to 500 cc

Who is online

Users browsing this forum: No registered users and 30 guests